 Pipeline editor

The pipeline panel is accessible only to Administrator and Project administrator users. This is where the project pipeline can be created and edited.
▹ More details about the pipeline.
Overview
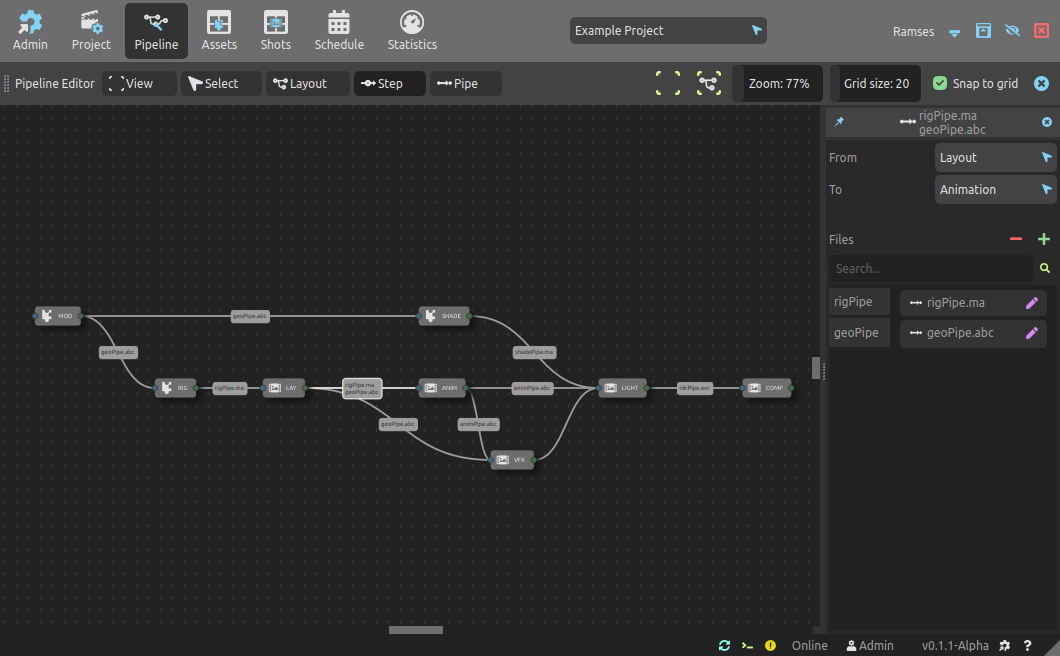
The pipeline editor has three main areas: the toolbar on top contains a few useful menus and tools, the nodal view is where steps and pipes are connected, and the dock shows the editors (on the right side of the nocal view by default).
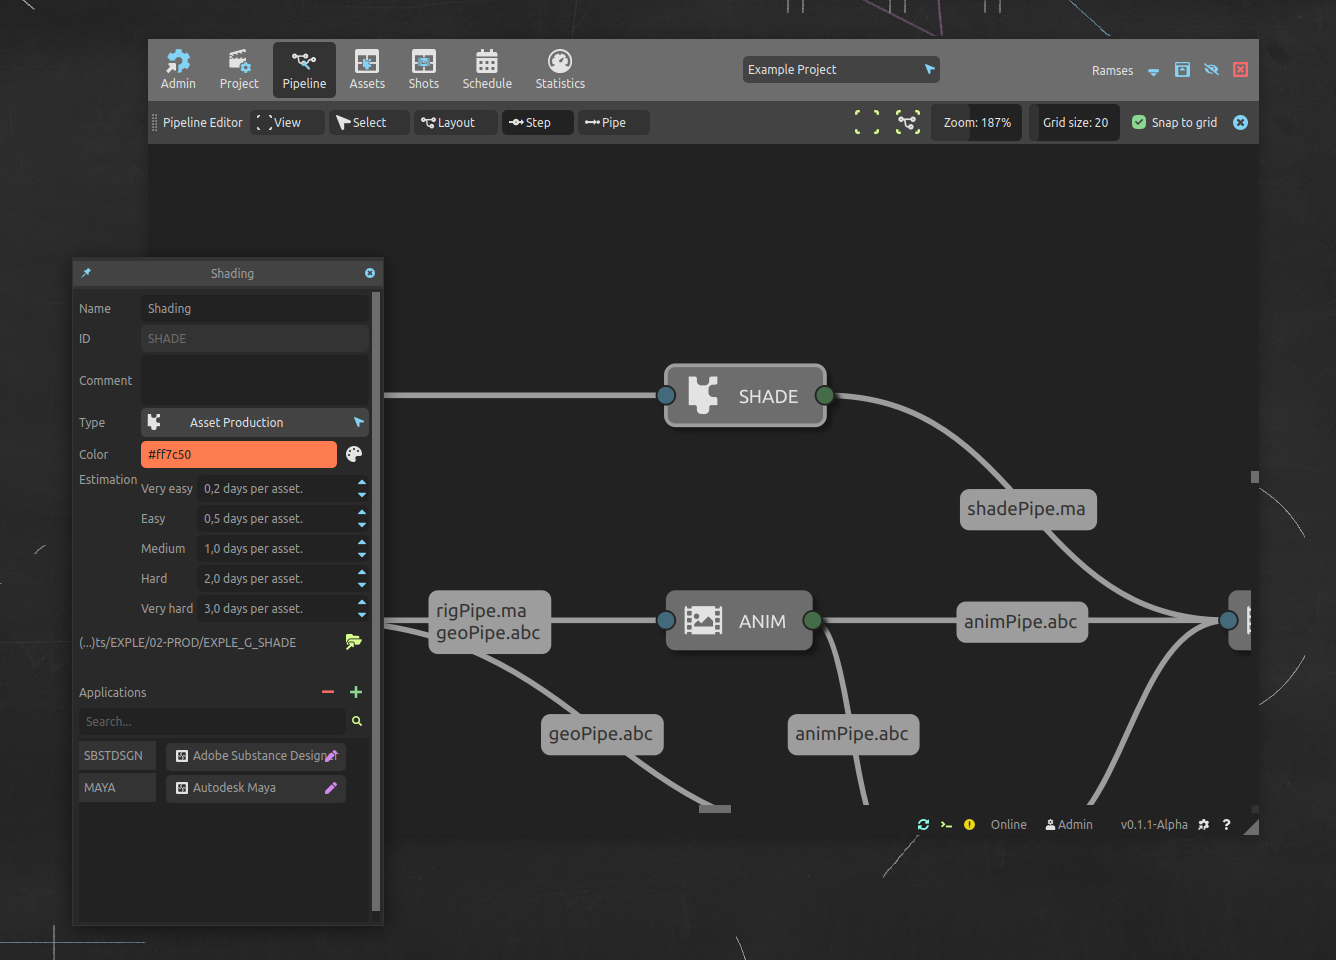
All docked panels can be undocked (as shown on the picture below) or docked on the other side of the nodal view, by dragging their title bar at the top of the panel.

Toolbar

On its left side, the toolbar displays a few menus.
View
- Center view resets the zoom of the nodal view to 100% and centers it. Shortcut:
[Home] - Center selection centers the selected nodes and zooms in on them. Shortcuts:
[F]or[.]on the numpad.
- Center view resets the zoom of the nodal view to 100% and centers it. Shortcut:
Select
- Select all steps selects all the steps in the nodal view. Shortcut:
[A] - Select children steps selects all the steps following the currently selected one(s). Repeat the command to expand the selection on the child side. Shortcut:
[Ctrl + A] - Select parent steps selects all the steps preceding the currently selected one(s). Repeat the command to expand the selection on the parent side. Shortcut:
[Alt + A]
- Select all steps selects all the steps in the nodal view. Shortcut:
Layout
- Layout all steps automatically arranges all the nodes using a smart (or not) algorithm to (try to) make the layout clearer. Shortcut:
[Shift + L] - Layout selected steps will use the same smart (or not) algorithm to (try to) make the layout clearer for the selected nodes. Shortcut:
[Alt + L] - Reload project layout will load the default layout for this project. Shorcut:
[Shift + R] - Save project layout saves (overwrite) the default layout for this project. Shorcut:
[Shift + S]
- Layout all steps automatically arranges all the nodes using a smart (or not) algorithm to (try to) make the layout clearer. Shortcut:
Step
- Create new step creates a new step from scratch in the project, and opens a side docked editor to edit its details. Shortcut:
[Shift + A] - The list of Template steps can be used to quickly create a new step from an template.
- Remove selected steps removes the selected steps from the project1. Shortcut:
[Shift + X] - Delete selection removes everything selected (steps and pipes) from the project1. Shortcut:
[Del]
- Create new step creates a new step from scratch in the project, and opens a side docked editor to edit its details. Shortcut:
Pipe
- Remove selected pipes removes the selected pipes from the project1, disconnected corresponding steps. Shortcut:
[Alt + X]
- Remove selected pipes removes the selected pipes from the project1, disconnected corresponding steps. Shortcut:
On its right side, the toolbar has a few settings available.
Center view, Shortcut:
[Home]Center selection, Shortcuts:
[F]or[.]on the numpad- Zoom changes the zoom of the nodal view. Minimum zoom is 25%.
- The Grid size is used when snapping nodes and defines the snap precision. It is displayed as small crosses in the nodal view when it has focus.
- Snap to grid will snap the nodes to the grid when moving them, allowing you to perfectly align them, you maniac.
Node view

In the node view, you can move around all the nodes (steps) by just clicking and dragging them. To select multiple nodes, just click on the background and drag the mouse to use a box selection.
You can select both nodes (steps) and connections (pipes); when a node or a pipe is selected, its corresponding editor is shown in the right dock area to let you edit its details.
To manipulate the view, use the following shortcuts:
[middle click]to pan.[Ctrl + middle click]to zoom.
When opening a project from the first time, the nodes may be stacked all together, and you’ll have to sort the spaghettis. To do this quickly, start by using the automatic layout! Select Layout ▸ Layout all steps or use the [Shift + L] shortcut.
Pipeline edition
To create and edit your pipeline, you just have to follow these simple steps:
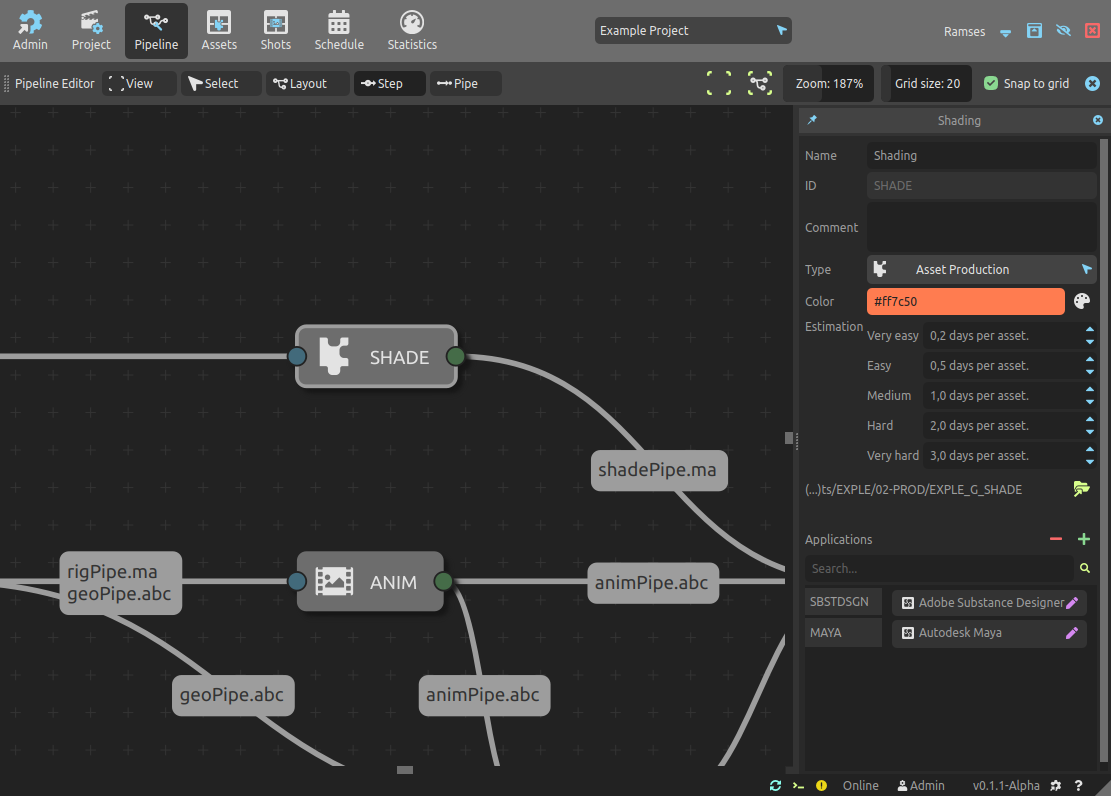
- Create new steps, either from a template using the Step menu or from scratch (
[Shift + A]). When a step is created, it is automatically selected and its editor panel is docked on the right area.

Read the project step settings documentation for details about the settings in the step editor. You can also edit the applications (and their file types) assigned to the steps with the edit button.
-
Connect the steps together: click on the green dot on the right of a step and drag to the blue dot on the left of another step to connect them. The connections goes from left to right (the step on the right is the child).
-
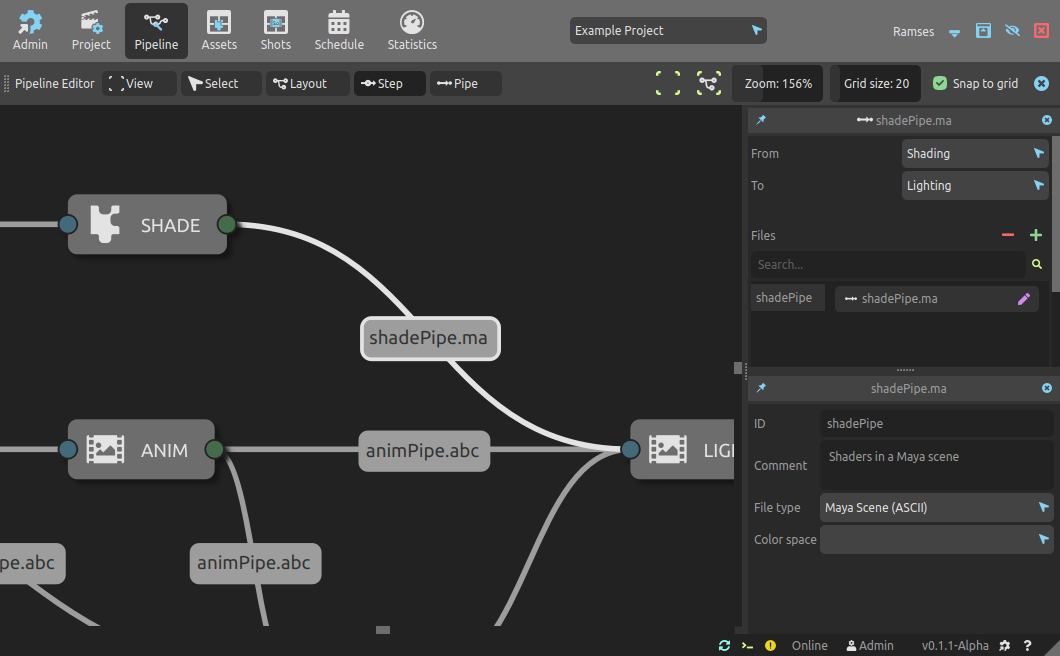
Select the connection (the pipe) to edit it.

In the pipe editor, you can check the steps from and to which the connections goes.
The Files list contains the file types this pipe can accept.
- The
button contains a list of available types you can assign to the pipe, and an entry to quickly create a pipe type without having to switch to the project pipe types settings panel.
- The
button unassigns the selected pipe types from the pipe but does not remove them from Ramses. You can also use the
[DEL]key. - From the list, you can use the
edit button to edit them in another side docked panel. Read the project pipe types settings section for more details about pipe types edition.
This list is what is passed to the Ramses Add-Ons when they’re exporting or importing items to and from the connected steps to let them know which kind of data and files they need to use.