 Schedule and planning

You can use the schedule panel to plan the production, per user and per step.
▹ More details about production planning.
Note
A future version of the application will include a more general schedule, to let you quickly select time ranges for each step, defining a starting and ending date for each, without having to assign tasks to individual users.
Overview
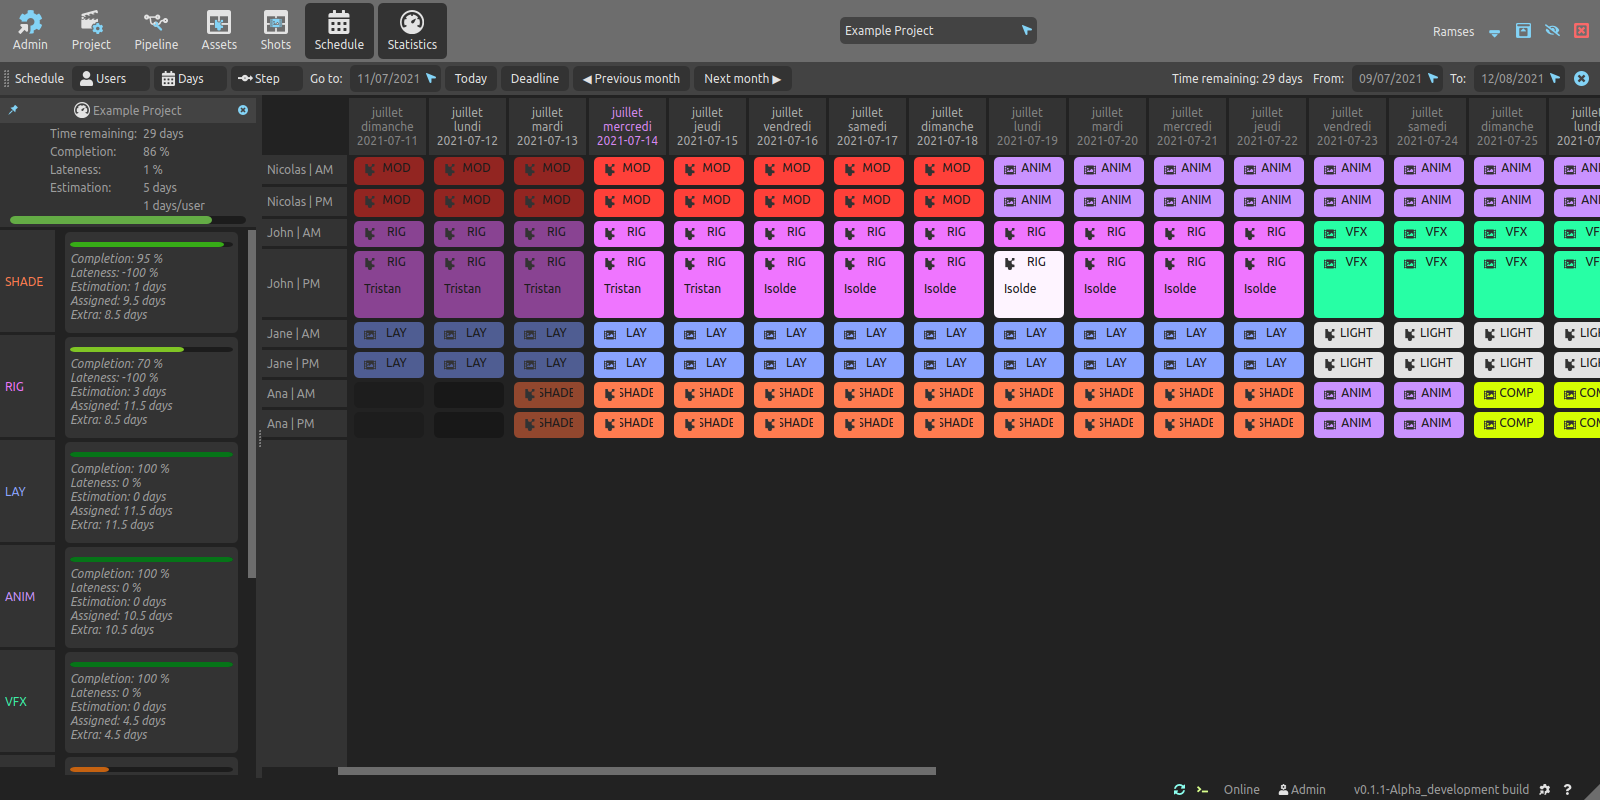
The schedule table has two main areas: the toolbar on top contains a few useful menus and tools, and the main table is where you plan the production.
It is useful to keep the statistics side panel at hand when planning the production.
Toolbar

On its left side, the toolbar displays a few menus and tools.

Users
- Me: shows only the current user in the table.
- Select all: shows all the users assigned to this project in the table.
- Select none: hides all the users from the table.
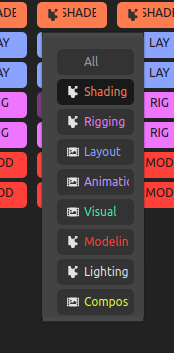
- The User list can be used to select the users to show in the table.
Days
- Select the days of the week to be shown in the table. This setting is kept across sessions, but it is a local setting, it is not shared with other workstations.
Step
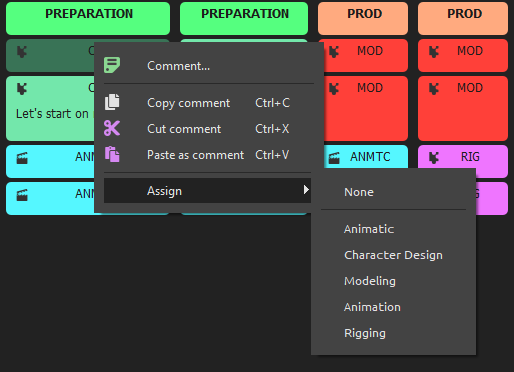
- Comment… adds a comment to the selected table cells (schedule entries).
- Assign (un)assigns a step to the selected celles (schedule entries).
Go to date scrolls the table to a specific date.
- Today scrolls the table to the current date.
- Deadline scrolls the table to the deadline of the current project.
- ◀ Previous month scrolls the table to the previous month.
- Next month ▶: I think you can guess what this button does.
The right side of the toolbar shows the time remaining before reaching the deadline of the project and lets you define the time range of the table.

Tip
The Step menu, to assign steps and set comments, is also availabe as a context menu with the [right click] on the table cells.
Main table

Each column represents a day, lines represent users. There are two lines per user to allow you to assign tasks only to half of a day.
The first line can be used to add any comment to the given day (column), for example to show deadlines, holidays, etc.
Columns in the past are darker than columns in the future, the current day is shown in purple in the header; the project deadline is shown in red. To help you differenciate weeks, an alternate grey is used for to separate them. You can hide the days of the week which are not working days (a.k.a. Weekends) using the Days menu.
Planning the project with the table is very quick and easy:
- Click on any cell to assign a step to the corresponding user and date.

- Use the context menu with
[Right click]to assign steps to multiple users and multiple days at once.

- You can also add a comment to selected schedule entries; comments are shown when changing the size of the rows.
- There are a lot of different ways to select multiple cells in the table:
[Left click + Drag]to quickly select contiguous cells.[Shift + Left click]to select the range between the active (last selected) cell and another cell.[Ctrl + Left click]to select individual cells.- These three methods can be combined: for example,
[Ctrl + Left click + Drag]to quickly select different groups of cells.
To check how many days you have to assign (or how many extra days you have already assigned) according to the estimations, use the Statistics panel.
 Statistics
The Statistics button on the title bar of the application opens a summary of the progress of all steps and the whole project.

The top part shows the statistics for the whole project.
- Remaining time is the count of actual days before reaching the deadline of the project.
- Completion is the global completion of the project, both as a percentage, and a number of work-days completed (compared to the total estimated work-day count).
- Estimated Lateness is an estimation of the lateness for all steps; 0% means all is well, a negative lateness means there’s some advance (no, this never happens), a positive value means the production is late. 100% means it took twice the time originally estimated to get to the current completion ratio!
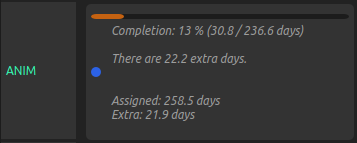
For each step, Ramses also compares the remaining work to the schedule, to warn you if you need to plan more days to complete the given step (or if there are extra days).
If you pull the row to make it bigger, you can get more details.

- Assigned shows how many days are assigned in the schedule for the given step, including past and future dates.
- Extra / Missing shows how many more days are needed to be assigned to the given step, or how many extra days are assigned, compared to the estimation. To the contrary of the extra or missing days shown above, this value does not take into account how much actual work was already done.